Set access levels and roles
Destiny Administrators and site administrators can set Destiny access levels and roles (Admin > Access Levels). Assigning appropriate access levels ensures that users have access to the features they need in Destiny.
Administrators can take ownership of any collection created at their site, using the same rights and privileges as the owner. For example, if a teacher or librarian leaves a district, the administrator can edit, delete, or copy that user's collection.
In addition, roles determine what actions users can perform in Collections, such as the visibility options they can choose for displaying their collection.
|
Note: Roles are assigned to a Destiny access level. The following table matches the Destiny default access level to the role in Collections. New access levels and existing custom levels default to the Student role. |
| Destiny access level | Role | Default visibility settings | ON/OFF | |
|---|---|---|---|---|
|
Administrator |
Administrator |
|
|
|
|
Guest |
Guest |
|
|
|
|
Library Administrator |
Administrator |
|
|
|
|
Patron |
Student |
|
|
|
|
Resource Administrator |
Administrator |
|
|
|
|
Staff |
Faculty |
|
|
|
|
Teacher |
Instructor |
|
|
|
|
Textbook Administrator |
Administrator |
|
|
To change the default access levels for roles:
- From the primary navigation bar, select
 > Back Office.
 - From the sidebar, select Admin > Access Levels.
- Select the access level that you want to change the role for.
- Click the Role drop-down to change the role.
- Click Save.
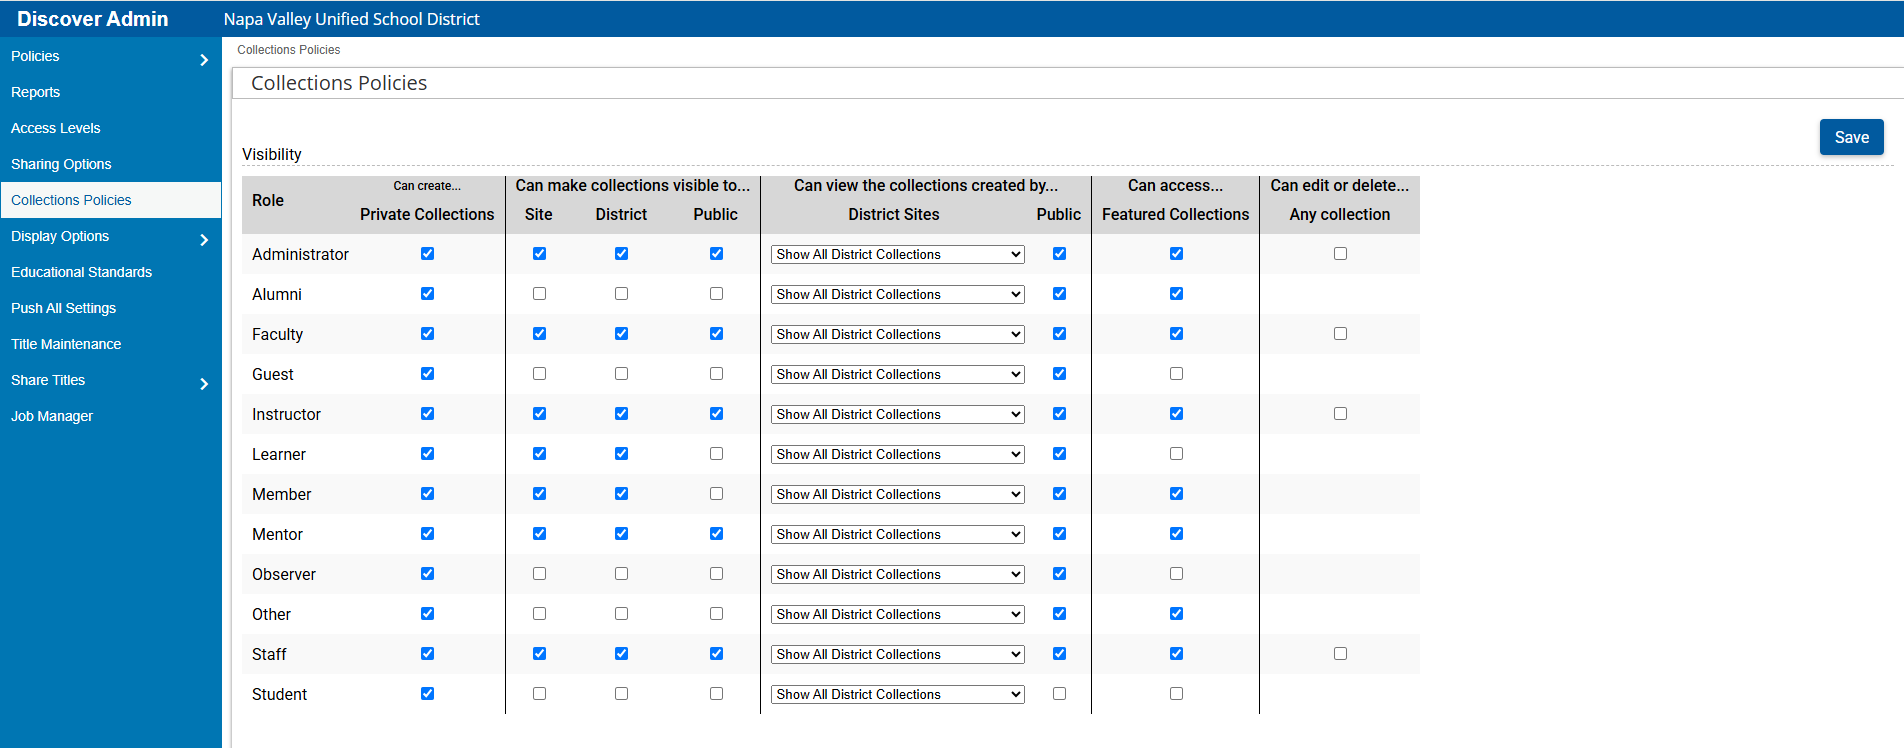
To change the visibility options for a specific role:
- Log in to Destiny Discover.
- From the primary navigation bar, select > Discover Admin.
- Click Collections Policies.
|
Notes:
|
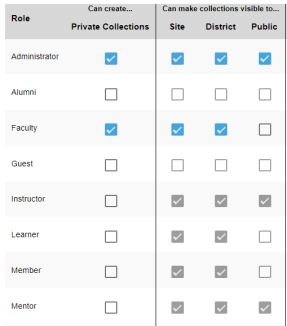
- Next to a role, select or deselect the checkboxes to change its visibility, or choose an option from the drop-down:
- Click Save.
To select specific standards for your site:
- Log in to Destiny Discover.
- From the primary navigation bar, select > Discover Admin.
- Click Educational Standards.

- Do one of the following:
- Select the individual standards you want to use.
- Click Select All to choose all the standards listed.
Note: The state standard available is based on your Destiny information. For example, if you're in Florida, you'll only see that state option.
- Do either of the following:
- To save your selections, click Save.
- To push standards to a specific site(s), click Push Educational Standards.
- Next to your district name, select the checkbox to include all sites, or click
 to see a list of site names.
 - Do either of the following:
- To include all schools within a site, select the checkbox next to the desired site name.
- To choose a specific school(s), next to the site name, click . Then, select the checkbox(es) for the desired school(s).
- Click Push Educational Standards.
- Next to your district name, select the checkbox to include all sites, or click
The standards you select appear on the Standards page under the Authority drop-down. For more information, see Attach standards to a collection.